Have you ever seen those cool benches made out of old wakeboards? I don’t know about you, but I think they look so awesome! Not only are they a great way to repurpose your old boards, but they also make for super stylish backyard furniture.
So I decided to try making my own DIY wakeboard bench this summer. And let me tell you, it was so much fun! Now we have the coolest new addition to our lake house.
If you want to make your own wakeboard bench, just follow these steps. I’ll walk you through the whole process from start to finish. Trust me, if I can do it, anyone can!
What You’ll Need
- Old wakeboards (at least 2 but you can use more)
- Wood boards – I used 2x4s
- Wood screws
- Paint (optional)
- Power drill
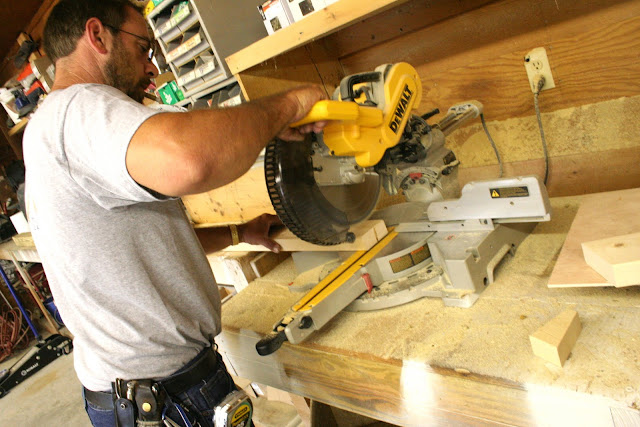
- Saw (a miter saw works great)
And that’s it! Not too complicated right? Now let’s get building.
How To Make Your Wakeboard Bench
Step 1: Cut the Legs to Size
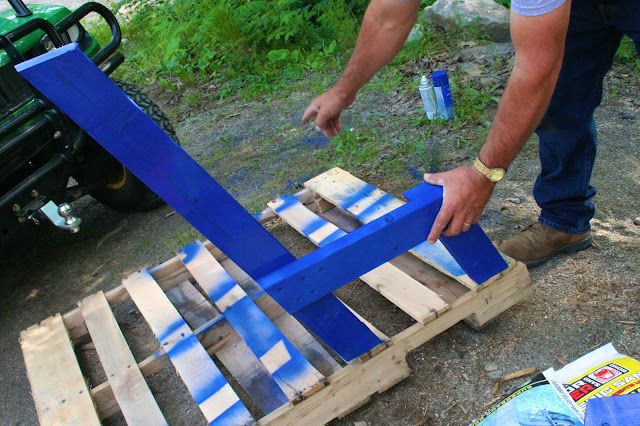
The first thing you need to do is cut your wood boards to the right lengths for the legs. You’ll want one longer front leg, and two back legs of the same shorter length.
I made my front leg 14 inches high, and the back legs 34 inches high. This gives it a nice slanted bench shape. The seat part I made 17 inches deep.
Pro tip: Measure twice and cut once! Nothing worse than cutting a piece too short.
Step 2: Paint the Pieces (Optional)
If you want to paint or stain your wood pieces, now is the time to do it. I gave mine a nice coat of white paint for a clean, beachy look.
Let the paint fully dry before moving onto the next steps. No one wants smudged bench legs!
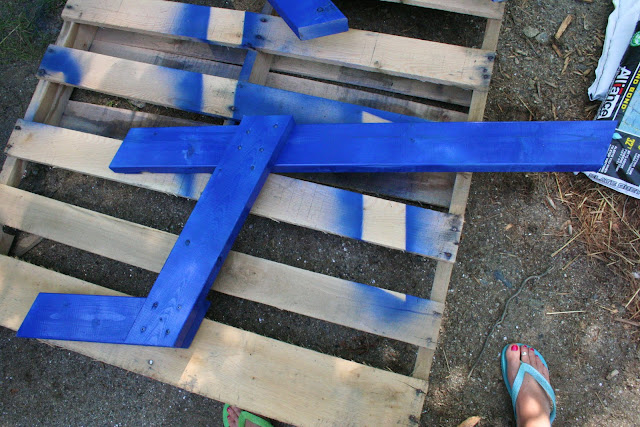
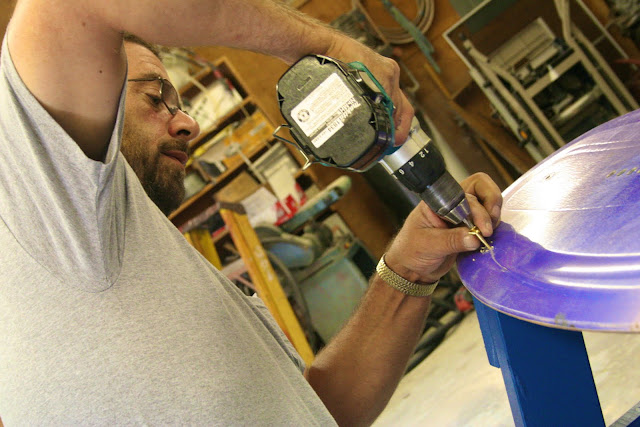
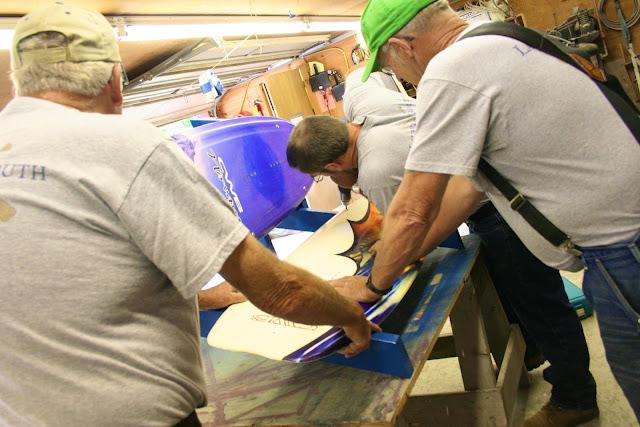
Step 3: Attach the Legs
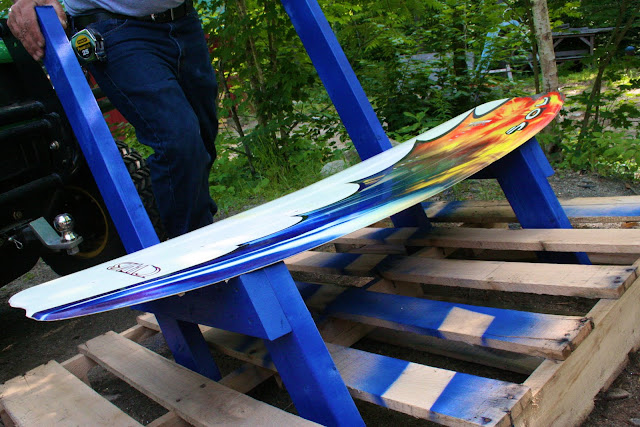
Okay, now for the fun part. Start screwing the legs onto the wakeboards to form the seat and backrest.
Make sure the front leg is attached at a slight backwards angle. You want it to lean back a bit so the bench doesn’t tip forward when you sit on it.
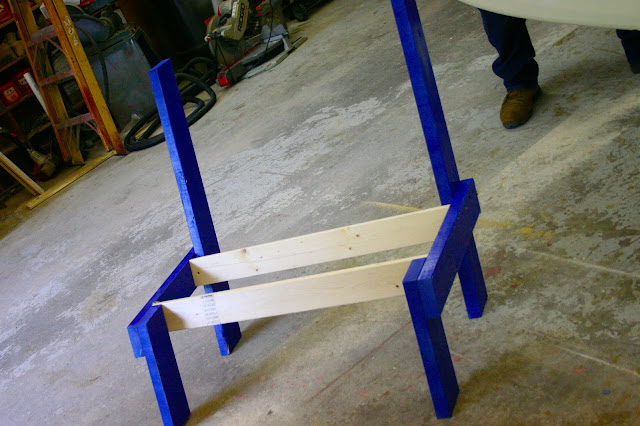
Step 4: Add Support Beams
Here’s an important step I realized halfway through – you need support beams running across the bottom to hold the legs in place. Otherwise, this thing will be wobbly and unstable.
Measure the width between the legs and cut support beams to size. Screw them into place on the underside of the wakeboards. This will keep the whole thing sturdy.
Step 5: Create the Seat
Next up is attaching a board across the top of the legs to make the seat. Measure the distance between the legs and cut a board to fit snugly.
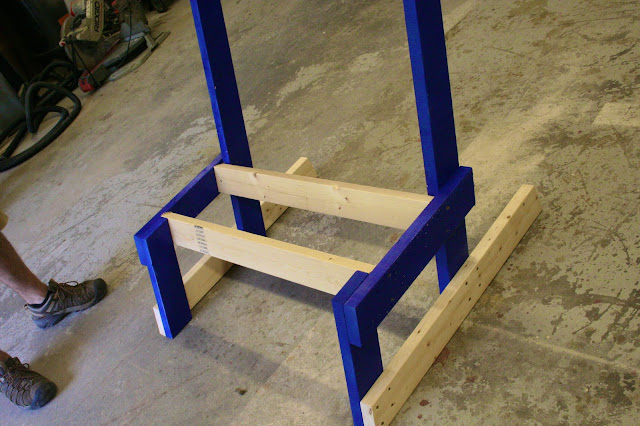
Use wood screws to attach the seat down into the legs. Make sure it feels secure and doesn’t shift around.
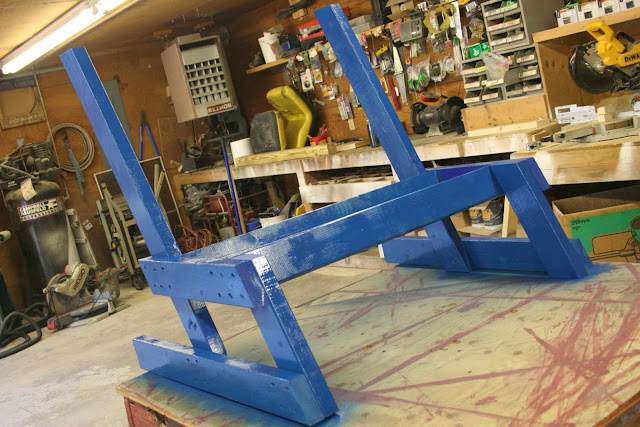
Step 6: Attach the Backrest
The last construction step is to screw a board onto the back legs to form the backrest. Measure from the ground to the height you want the backrest.
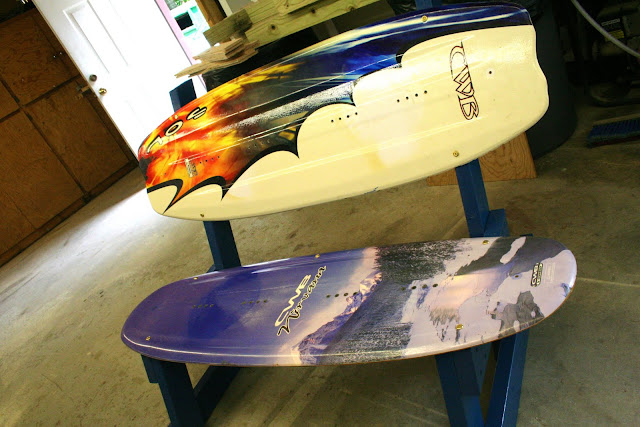
Cut a board to length and screw it into the back legs. And voila, you’ve got a completed wakeboard bench frame!
Step 7: Add Finishing Touches
To polish off your new backyard masterpiece, consider adding some finishing design touches.
You could attach rope or twine along the edges for an outdoorsy vibe. Or use brass screws for a classy accent. Get creative with it!
Step 8: Find the Perfect Spot
Now it’s time for the best part – taking your finished wakeboard bench out to enjoy!
Carry it outside and place it in the perfect spot. I put mine along our dock overlooking the lake. Ahh, perfection!
Pop a cold drink in the cupholder and get cozy. You’ve earned it after all that hard work.

FAQs About Building Your Own Wakeboard Bench
Got questions about creating your own wakeboard bench? Here are some commonly asked questions:
How many old wakeboards do I need?
You can make a bench with as few as two wakeboards. I’d recommend at least three though so you have more coverage across the seat area. The more the better!
What size wood should I use?
2x4s are perfect for the legs and supports. For the seat and backrest, you can use 1×6 boards.
What’s the best angle for the front leg?
I’d recommend a 10-15 degree angle backward. Not too drastic, just enough to prevent tipping.
How do I cut the wood boards?
A miter or circular saw works great for cutting wood boards straight. A jigsaw can also get the job done.
What’s the best way to attach the boards?
Definitely use exterior wood screws. They are designed to withstand the outdoor elements. Space screws every 4-6 inches for maximum hold.
How long does it take to make a wakeboard bench?
With all the cutting, assembling, and finishing, plan on 6-8 hours total. But it’s a fun project you can stretch out over a few days!
What can I use if I don’t have old wakeboards?
You can use snowboards, skateboards, or even old surfboards if you have those instead! Get creative with materials.
Final Thoughts
And there you have it friends – everything you need to know to build your very own wakeboard bench! With a little bit of time and elbow grease, you’ll have a gorgeous new backyard furniture piece.
Wakeboard Traveller hope you found these steps helpful. Let me know if you have any other questions. I’m happy to help however I can!
Now get out there and make something awesome. Wishing you the best of luck with your wakeboard bench building. Go get it!


Leave a Reply